
Pay in installments of $5.74 with
 ,
,
 and
and

Shipping Estimate
USA
- USA
- CAN
- USA
- CAN
Ships within 48 hours · Estimated delivery Jul 24 - Jul 29
 Promo Codes Available:
For Your Every Summer RSVP, with Code: SUMMER15
Description
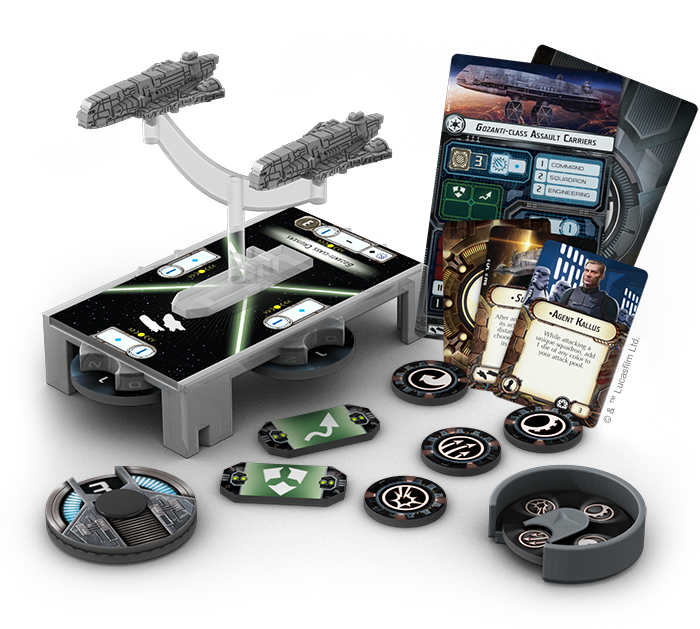
Star Wars Armada - Imperial Assault Carriers"Have no fear. Help is on the way."Agent Kallus Cruisers and Assault Carriers As with all the other Armada starships released thus far, your flotilla of Gozanti class cruisers can be paired with either of two different ship cardsthe Gozanti class Cruisers or the Gozanti class Assault Carriers. As both of these flotillas can only fire a single die at a time in ship to ship combat, neither is likely to be used in such a capacity. Admittedly, with the
"Have no fear. Help is on the way."
–Agent Kallus
Cruisers and Assault Carriers
As with all the other Armada starships released thus far, your flotilla of Gozanti-class cruisers can be paired with either of two different ship cards—the Gozanti-class Cruisers or the Gozanti-class Assault Carriers.


As both of these flotillas can only fire a single die at a time in ship-to-ship combat, neither is likely to be used in such a capacity. Admittedly, with the red attack die from their forward hull zone, the Gozanti-class Assault Carriers are more likely to be able to fire a shot or two at an enemy ship. Still, with only three hull and no more than a single point of shielding on each hull zone, your Gozantis cannot afford to get caught in enemy fire. Not even their potent scatter token will protect them against the sort of sustained fire an Assault Frigate Mark II or the Home One could throw at them.
Instead, you will most likely want to keep these ships at a distance and use them to support your squadrons or your other ships. After all, with their squadron value of "2," your Gozantis offer you a highly cost-efficient means of conveying commands to your bombers and other squadrons. Indeed, you should probably expect to see these flotillas anchoring bomber squadrons, often making use of Expanded Hangar Bay , Bomber Command Center , and the Vector Title.


Equipped with an Expanded Hangar Bay, the Vector commands three Firespray squadrons to bombard the Rebellion's Corellian corvette.

Perhaps simply because it seems so natural to hold your Gozantis back at a distance from the main thrust of the battle, you may also see a few daring fleet admirals aim for the element of surprise by flying their Gozanti flotillas straight at an enemy ship in order to soften it up for the rest of their fleet. Such a tactic would likely rely heavily upon the Gozanti's scatter token, possibly even discarding it in the initial approach in order to bring the flotilla's Slicer Tools into play.
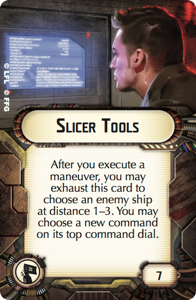
Some clever maneuvering may allow a Gozanti commander to get within range of its Slicer Tools, even as it stays just out of range of the black dice on a ship like the MC30c Torpedo Frigate, and the fleet admirals who can pull off this sort of maneuver are the ones who should consider flying the Suppressor and recruiting General Tagge as their commander, in order to refresh their flotillas' scatter tokens in the third and fifth rounds of play.


The Suppressor flies into range to use its Slicer Tools against the Rebellion's MC30c frigate, even while staying out of range of the ship's potent black dice. Since the MC30c is currently unable to command any squadrons, the Imperial commander resets its top command dial to a squadron command, and if the MC30c ends its maneuver within distance 1–3 of the Suppressor, the Imperial commander will also be able to exhaust one of its defense tokens.

Fleet Support
There are a total of four different Fleet Support upgrades in the Imperial Assault Carriers Expansion Pack. Along with the Bomber Command Center and Slicer Tools, you will also find Comms Net and a Jamming Field . Each stands to define your flotilla of Gozantis by outfitting it with a different ability, but more than that, each suggests a different way of flying your flotilla.

- The Bomber Command Center requires you to keep your flotilla within distance 1-5 of friendly bombers.
- Your Comms Net requires you to keep your flotilla within distance 1-5 of a friendly ship.
- Slicer Tools require you put your Gozantis at risk, by maneuvering them within distance 1-3 of an enemy ship.
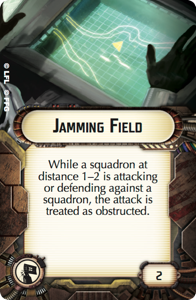
- Finally, a Jamming Field works best when you can maneuver your flotilla beyond distance "2" of your squadrons, yet can remain at distance 1-2 of the enemy squadrons engaged with them.
Because they offer the most forgiving ranges and require you only to maneuver your flotilla into position with your other ships and squadrons, rather than establishing a position relative to your opponent's ships or squadrons, the Bomber Command Center and Comms Net are likely the easiest Fleet Support upgrades to incorporate, and one can easily imagine facing future Imperial fleets that use their Imperial Assault Carriers not only to fling Major Rhymerand other bombers at enemy ships, but also to feed their Imperial-class Star Destroyers an engineering token each round, so that the bigger ships can keep their shields up almost indefinitely.

The Imperial commander assigns an engineering command to his Gozanti flotilla, then uses its Comms Net to pass the engineering token to the Imperial-class Star Destroyer, allowing it to spend six engineering points when it reveals its own engineering command. The Star Destroyer then uses those six engineering points to recharge its left hull zone's shields from zero to three.

On the other hand, it is precisely because the other two Fleet Support upgrades—the Slicer Tools and Jamming Field—are so much more difficult to coordinate that they may eventually prove to make the greater impact. Their use requires a greater degree of skill and vision, but it is easy to imagine how a flotilla equipped with Director Isard and Slicer Tools may render enemy ships more vulnerable to your Imperial-class Star Destroyer's Phylon Q7 Tractor Beams .
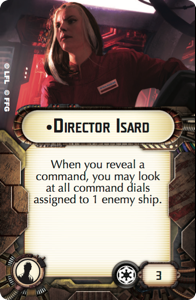

By using its Slicer Tools to change an Assault Frigate Mark II's top dial from a navigate command to a squadron command, the flotilla of Imperial assault carriers renders the Rebel ship vulnerable to the Imperial-class Star Destroyer's tractor beam, ensuring that the Star Destroyer will be able to keep it within its front arc for at least one more volley.
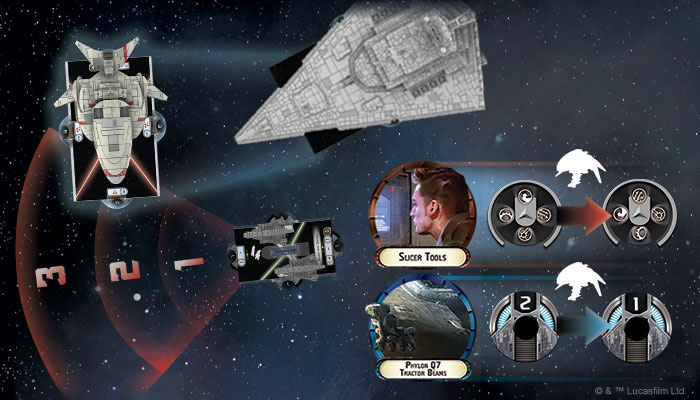
Moreover, the more highly skilled fleet admirals will also do a better job of anticipating the ways that ships and squadrons are likely to move across the battlefield, and it is easy to believe that some of the most highly skilled admirals will be able to plan their maneuvers so that their flotillas can command their bombers into battle before following after them with their Jamming Fields to protect them from retaliatory strikes by enemy fighter wings. Add another flotilla of Gozantis and the Intel keyword from a squadron like Dengar's , and you may be able to design a small, mobile strikeforce that can fairly well ignore enemy squadrons as it repeatedly hammers enemy ships.

The Imperial commander uses his Gozantis to command Dengar and a pair of TIE bombers to strike at a Nebulon-B frigate. Then, through some skillful maneuvering, he catches the Rebel squadrons within range of his Jamming Field, even while leaving his squadrons clear.

General Tagge and Agent Kallus
Rounding out the Imperial Assault Carriers Expansion Pack's eight different upgrades are its commander and officer, General Tagge and Agent Kallus .

With his ability to restore defense tokens, General Tagge is a boon to any strategy making use of aggresively minded Gozanti commanders, who may certainly need to burn their scatter tokens to survive. But his influence also reaches far beyond aggressive Gozantis. For starters, you could burn defense tokens from yourDevastator in the early rounds to gain offensive advantages, and then regain them in the third and fifth rounds in order to hold the ship together for the eventual win. Similarly, Tagge allows you to more aggressively burn shields to fuel the attacks from your Dominator since, later, you will be able to recover one or two of the defense tokens you likely need to stay intact.


Nonetheless, Tagge is not, himself, truly an aggressively minded upgrade. He is more defensive, and it is only his foresightedness that shores up the weaknesses you expose by attacking so aggressively. Among other things, that means that you need to plan your approach to best maximize your offense in the early rounds, at which time you'll want to burn defense tokens to withstand your enemy's attacks. By the start of the third and fifth rounds, you will want to have gained a significant advantage, and Tagge should be helping you recoup the costs.
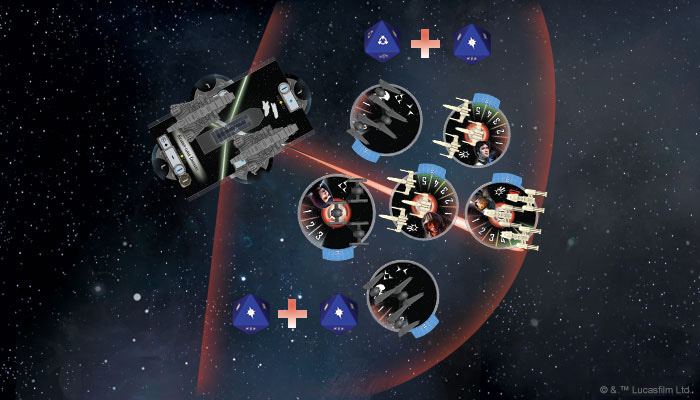
Finally, Agent Kallus provides an answer to any Rebel fleet that threatens to harry your ships with unique squadrons. Arguably best used aboard a Raider II-class Corvette equipped with one of its unique Titles, the Impetuous orInstigator , Agent Kallus is also a natural fit for a Gozanti flotilla designed to lead a fighter wing ordered to hunt down enemy bombers. Aboard a flotilla of Gozanti-class Assault Carriers with Jamming Field and Expanded Hangar Bay, Agent Kallus and his squadrons are more than capable of thwarting any Rebel bomber wing.


Agent Kallus leads a fighter wing to intercept the Rebellion's unique fighter aces. After skillfully catching Luke Skywalker and "Dutch" Vander in two firing arcs, Kallus adds a total of five dice to his flotilla's attacks for the round—one to his attack against Wedge Antilles, and one each to all the flotilla's attacks against Luke and "Dutch."
How Will You Fly Your Flotillas?
Ultimately, the best way to fly a flotilla of Gozanti-class cruisers is the way that best complements your overall strategy. But the question remains: how will you make use of these flexible flotillas to complement your fleet? Will you rely upon them to activate your squadrons? Will you field multiple flotillas and activate them early in order to draw out your opponent's larger ships? Will you use them to ensure your commands are more effective than your opponent's, from round to round?
Shipping Notes
- Free Standard Shipping on $100+ Orders to the USA.
- Except Preorder products are shipped in 48 hours.
- Delivery to the USA:
- Standard Shipping : 3-10 business days
- If time is of the essence, please consider selecting expedited delivery for faster service.
Exchange/Return Notes
- We offer a 30-day return/exchange service after receiving.
- Final sale items are not eligible for returns or exchanges.
- To process your return/exchange, please contact us at [email protected]
- Please click here for more details>>> Return & Exchange Policy